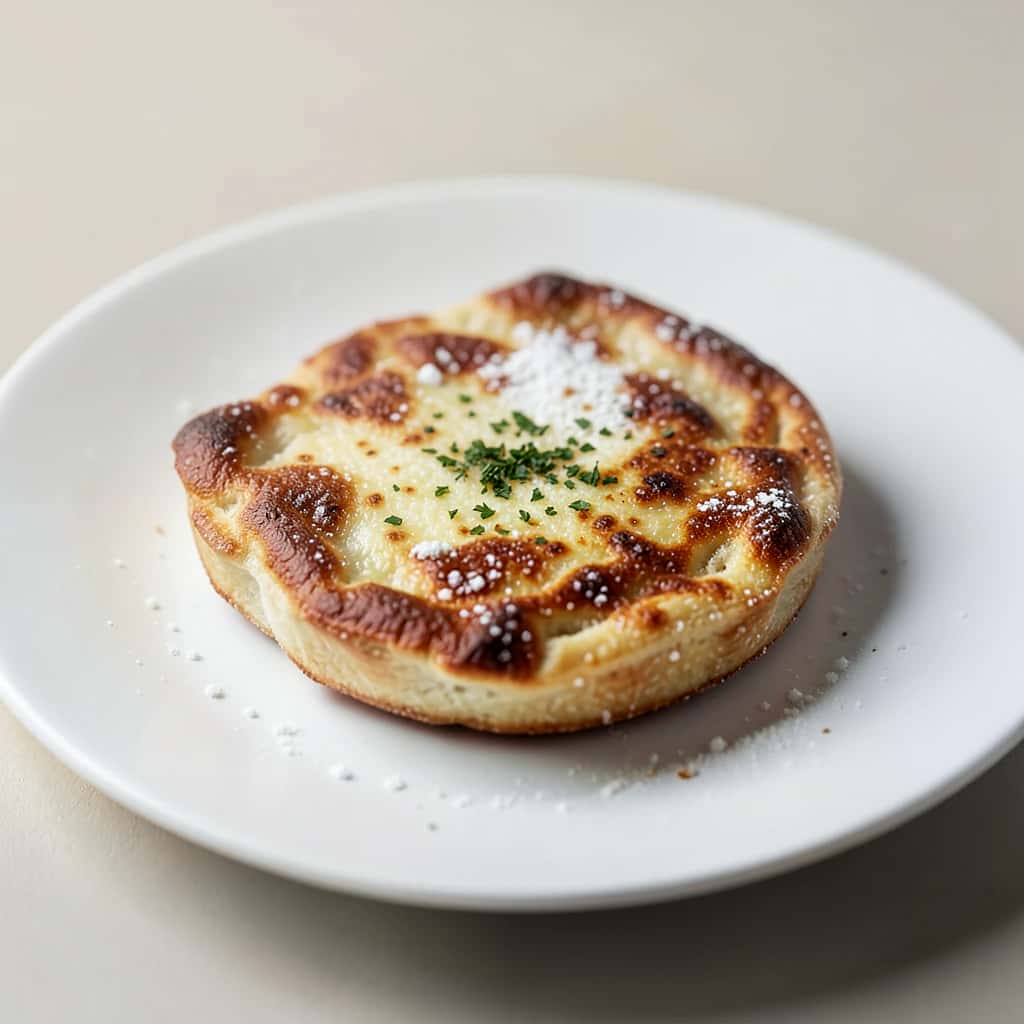
Global CucinaGlobal Cucina
About
Global CucinaGlobal Cucina
HomeAbout
  1. Home
  2. Recipes
  3. Pasta
  4. Genoese Focaccia
ItalianMedium

Genoese Focaccia

AT

By

Ago Tanfossi

Chef and recipe curator at Global Cucina

Published on March 14, 2026

Available in

EnglishItalianoDeutschEspañolFrançaisRomână

You can change language anytime.

Genoese focaccia, or "fùgassa" in the local dialect, is a typical specialty of Ligurian cuisine and has become a Slow Food product. 00

Genoese focaccia is an art of simplicity and precision, where the combination of flour and Manitoba creates a perfect structure, soft but firm. Its secret lies in the slow fermentation, which enhances the natural flavors and makes each bite light and deep, as a true Ligurian dish should be. This recipe, recognized as a Slow Food product, is an authentic alternative to industrial products, made with ingredients that speak for themselves without exaggeration. Its versatility and ability to adapt to any table make it a safe choice for those seeking quality.

Capolavoro Score 4.3/5 · 14 votes
Genoese Focaccia

Ingredients

Ingredients

  • 13.3 oz Flour
  • 8.3 oz Manitoba flour
  • 0.3 oz Malt
  • 0.6 oz Fresh yeast

for initial mix

  • 11.2 oz Water
  • 0.4 oz Salt
  • 1 oz oil

for later step

  • 2 oz oil
  • 0.3 oz Salt
  • 6.7 oz Water

Instructions

  1. 1

    To prepare the Genoese focaccia, pour the Manitoba flour and flour into a bowl. Mix with a wooden spoon, then make a small hole in the center and pour in almost all of the water.

  2. 2

    Mix again to absorb the water, then add the malt and all the salt together.

  3. 3

    Mix, then add the remaining water and continue working with the wooden spoon until you get a smooth dough. Once the salt has been incorporated into the flour, you can add the crumbled fresh yeast.

  4. 4

    Mix a few more times and the dough is ready to be transferred to a work surface and continue kneading by hand, quite energetically. If some flour has not been absorbed, it doesn't matter: it will be absorbed by kneading, by pressing with the palm of your hand while kneading, mimicking the movement of a machine. After a few minutes, when you see the gluten network forming, so the dough becomes more homogeneous and almost elastic, add the oil to the dough.

  5. 5

    Continue working on the surface to absorb all the oil, continuing to knead energetically. Depending on the type of flour used, it may be necessary to sprinkle with a small amount of flour while kneading. In total, it will take 13-15 minutes to obtain a smooth and homogeneous dough. You can cover it and let it rest for a few minutes. Then remove the cloth.

  6. 6

    Close the dough by rolling it on the surface. You will notice that in a few seconds it will become smooth. Divide the dough into two pieces of 500 g each. Shape them into rectangles by flattening them with your hands.

  7. 7

    and fold them into thirds. To do this, you can fold the dough over itself, bringing one edge to the inside and then folding it again, leaving a seam underneath and rolling it up to finish, so that the seam remains in contact with the work surface, lightly sprinkled with flour. Repeat the same operation for the other half of the dough. Cover with a cloth and let it rest for about 30 minutes.

  8. 8

    Remove the cloth, take one of the pieces of dough and keep the other covered. Grease a 30x40 inch baking sheet with 15 g of oil, making sure to reach the corners because the oil will spread to the edges. Place the dough on a lightly floured surface, flatten it with your fingers, using only your index, middle and ring fingers 3 fingers of your hand.

  9. 9

    Then use a rolling pin to spread the dough, rotating the dough from time to time to maintain a rectangular shape. Place your hands under the dough, then rotate them so that the back of your hands lift the dough and place it gently on the baking sheet without damaging the dough until it covers the entire surface 70-80%. Cover with a cloth and let it rest for another 20-30 minutes. In the meantime, repeat the same operation for the second piece of dough.

  10. 10

    At this point, sprinkle the focaccia with a small amount of flour, press firmly with the tips of your fingers, spreading the dough over the entire baking sheet, starting from the perimeter to create a small border. It is important that the dough adheres well to the baking sheet, so when you pour the brine over it, it will not end up on the bottom. Smooth the surface as much as possible with the palm of your hand.

  11. 11

    Cover again and let it rest for an hour. At this point, prepare the brine by mixing water and salt 32 until the salt is completely dissolved.

  12. 12

    Uncover the focaccia, sprinkle it with a small amount of flour and with your three fingers (index, middle, ring) make the typical holes by pressing firmly and pushing towards the edges: the fingers should not be perpendicular to the dough, but slightly inclined. You should leave about 1 cm between one hole and the next. When you have almost finished making all the holes, rotate the baking sheet, so it will be easier to make all the holes along the edge as well.

  13. 13

    Now pour 30 g of oil and 90 g of brine into the center of each focaccia. Then spread it gently with your hand so that it fills all the holes. Let it rise for another 40-45 minutes, this time without covering it. Bake in a preheated oven at 230° for 15 minutes (if the oven is very powerful, we recommend changing the temperature, but not the baking time. It is best not to bake for more than 15 minutes to prevent the focaccia from drying out too much). When the surface is golden brown, you can take the focaccia out of the oven! Let it cool for a few minutes, cut it and serve!

Ago's Notes

  • Adjust the salt according to the salt content of any canned ingredients.

May the respect for the ingredients and the balance between yeast and oil guide you to the perfect result, and may each portion be a tribute to tradition and the passion for food. Enjoy!

Ago Tanfossi signatureAgo Tanfossi signature
Pasta

How much of a capolavoro is this?

Share your opinion. Ago will say it the Italian way.

Pick a hand and tell Ago what you think.

Related Recipes

Fried Panzerotti
Italian

Fried Panzerotti

Fried panzerotti are filled with mozzarella, tomato, and oregano, a delicious specialty of Apulian cuisine: discover the recipe to make them at home!

Medium
Pandoro
Italian

Pandoro

Homemade pandoro is a classic Christmas treat, a soft and fluffy cake that's delicious when dusted with powdered sugar. Discover the perfect recipe to make it!

Medium
Margherita Pizza
Italian

Margherita Pizza

Margherita pizza is the most classic and beloved version, with tomato, mozzarella, and basil: discover the recipe to make it at home like in a pizzeria!

Medium

Browse by Dish Type

Main Course

227 recipes

The main course, or secondo, holds a central place in the structure of an Italian meal.

Pasta

74 recipes

Pasta is a fundamental category within Italian cuisine, serving as the primo piatto or first course in a traditional meal structure.

Dessert

39 recipes

Dessert, or dolce in Italian, occupies a distinct and deliberate place within the traditional Italian meal.

Soup

35 recipes

Soup, as a category within culinary taxonomy, represents a fundamental component of the Italian dining experience.

Salad

15 recipes

The category of salad occupies a distinct and purposeful role within the Italian meal framework.

Browse by Cuisine

Italian212International118American29Thai12
Global Cucina

Cooking the world, the Italian way

AboutContactPrivacyCookie settings

© 2026 Global Cucina by Ago Tanfossi. All rights reserved.